Weekend Workshop Weathering Class Review!

Besides the abundance of epic beards and proper glasses, a group of painters gathered in the hallow halls of the Scythe and Teacup in Liverpool to learn some weathering and vehicle painting techniques from John Harrison of The Weekend Workshop fame.
The photo above can show the students all looking on as he demonstrates his talents to us all.

And dat guy taking photos while the others worked hard! Silly guy...
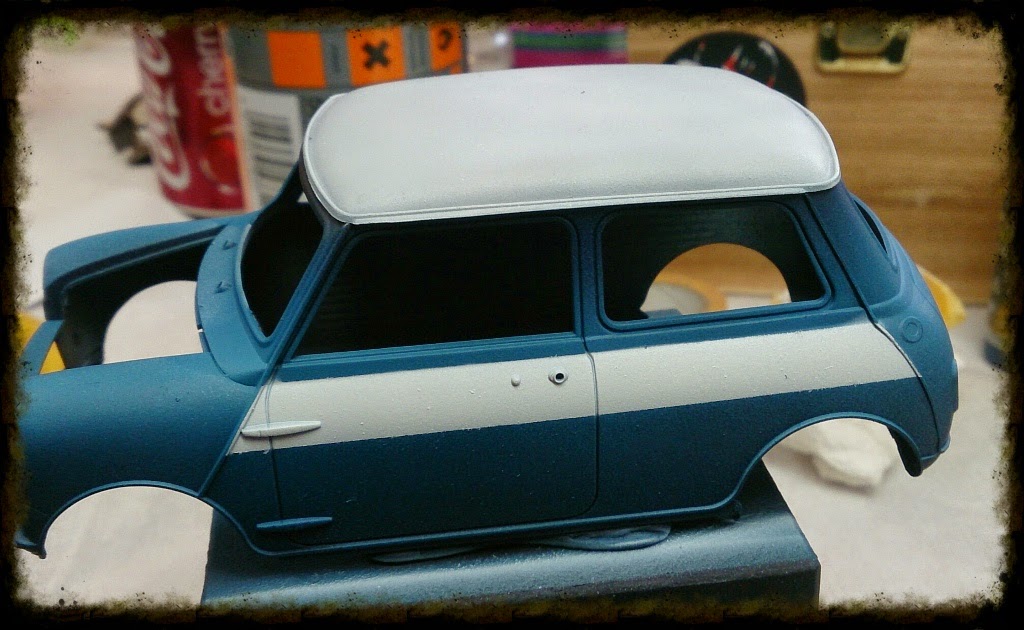
To kick off the workshop we were all given a classic Mini Rally car from Tamiya as our piece to work on for the class. John had already prepped and worked on one prior to the show and it looked like this before more work was put on it..

I have to say from looking at this photo my expectations of the class were quite high... thankfully John delivered on this quite well.
So with model in hand, we began with the first aspects of the paint. For most, and with John's advice, no primer was required! How daft is that! I had to go and do a black primer just cause my brain couldn't handle the thoughts of no primer... not that it would help in some aspects later on!
Quickly after the primer we began to airbrush on the darker of the rust colors. Using John's Life colors rust series as the base colors here.

Oooo looks like a chocolate mini!
This was quickly followed by the brighter rust sections.. again from Life Colors..

Whoa.. kinda cool color transitions happening already.. and some sponging happening with even lighter colors over it as well.

A quick shot of mine with another's mini.. showing off our rust painting skillz!!
It was here that we began to do the coating for the chipping medium. I was thinking, bah, I know how to do this! But John caught myself ( and many others ) trying to speed up the process with a hairdryer... which apparently is a massive NO NO!!!! It drys out and evaporates the crucial aspect of the medium and prevents it from doing its job. I would call BS on this, but when I did hurry it up near the end in some spots I can see the results when I rubbed the paint off all the way back to the model! Oops!
But with this in mind, and the model prepped.. I started to do some chipping on the bonnet ( or Hood as we from North America call it ).

Yes.. I did revert back to my go to color for the model.. blue. It was commented that it is a bit too sci-fi coloring for such a vehicle and time period, but damn if it didn't come out cool ( or be used by another painter in the class! ).
Feeling quite good about the results here.. I began to tackle the body of the car next! I was even adventurous to attempt a 2 color scheme.. blue for the body, and white for the roof!
Slight problem with that...

It seems my masking skills leave much to be desired here. But that is ok.. cause I can fix it! With a racing stripe!

Voila! Still horrible masking job on the edges there, but that is where chipping will come in! Though it seems that although these pictures make it look easy... Andrew's photo of me attempting to do it makes it look not so easy..

And no that is not a paint brush! Doh! But it does help to get the tape to get into those hard to reach areas..
Soon after the main colors were applied, we began to chipping once more!


Having fun here. Also the point to get here right was that we stab the paint with a brush loaded with hot water, and not trying to drag it off as much. When dragging I could put too much pressure and pull paint off to the model itself. With stabbing it, not as much. Oh and that pointed tool from before.. also good, but not from the point! Lesson learned there..
Was a quite interesting aspect to get to this point however and seeing what can be achieved. I will have to give this a go on more pieces, and see if the chipping medium, if left, will work better for the Model Mates rust compounds also. So much potential there at the moment.. but it is all about learning!


The group weighs in on this ( with Peter being the instigator here obviously ), and all agree.. yup, great progress so far, and many ideas for future projects already jumping about!

But we need to get back to work cause we still have to oil the cars up! But first.. gloss varnish to make the oils work easier on the surface! I do remember from a conversation at SMC with Oli that Tamiya X-22 could help here, but honestly I couldn't remember the why or when. Need to discuss that with him more now outside of the workshop.


Progress made with the oils here. Taking some browns, reds, yellows, greens, blues, blacks... and probably other colors we began to apply the colors to the model. Dabbing a bit of the color on the piece, and then taking a dry brush to work it into the piece further. Using White Spirits to remove it when too much was applied or move it around a bit if required. This was a lengthy progress for us, and one that was quite a bit of fun. I even went over the zombie base for Roman with some oils to create some color variations on the bricks!
We did play around with some pigments on the vehicles and how to attach them. I have to practice this more, and also understand what tones they will dry like as I was not liking some of the effects that came from it. It works, but I believe I still have a lot to learn with regards to pigments still :(


One part that I did know how to use it properly though was on the windows! And it came out great there. Really happy with the result there. And with the final photos above you can see what I accomplished in just 2 short days of painting.
Final results from the class also shows that a lot of progress was made on this, and that everyone left the workshop in a very big high on painting vehicles! I do believe a few orders of some will occur in short time here ( maybe even for me! ).

Great work done by all, and now to get back to painting and finish some projects off! Maybe this will even be one of them ;)


Really great stuff! Lovely photos, and really great job on the rust effects! What type of oils were you using?
ReplyDeleteOily oils were used for the oil sections :)
DeleteMostly W&N Artistic Oils, but any would do I would think. Colors were more in the Umber range, and keeping to browns, and dark red/oranges. Though for some of the variations, I used Yellows/Blues/Red/Green/Black/White :) Basically.. everything!
I need a class on just the oils. I've never worked with them at all. So you just use them as per acrylics, but they basically never dry? (so you can keep pulling them thinner and thinner?)
DeleteHard to explain, so will need to show on a step by step maybe? But essentially, it is putting down some gloss varnish, applying the oils where you want them, and then thinning them with White Spirits directly on the model. And thinning them until you are satisfied with the results. Step by steps with photos would help more I assume :D
DeleteInteresting! Ya I figure I'll need to just take a class. Hopefully adepticon has some next year. :) . It's amazing what you learn in just a few moments in person, compared to trying to figure it out on your own. (though randomly figuring stuff out also produces amazing results sometimes :) )
DeleteThat is really quite sensational - what a great day out.
ReplyDeleteWas 2 days actually.. so was a nice way to spend the weekend. Great group of usual suspects showed up and everything. Now to see what I can do with it. :)
DeleteGreat write up dude. Thank you. Roll on 2015 for more Workshops, and hopefully a little further south next time :)
ReplyDeleteYes.. though the year of the travelling brush is almost coming to a close.. will have to think of something for next year.. and hopefully see how everyone else's works come along!
DeleteNice write up. Somewhere I already saw this technique in a tutorial (maybe on Youtube?) but I can't remember. Looks pretty cool!
ReplyDeleteSeeing forward to this stuff applied to your models :)
Thanks Paradox0n! Am also looking forward to it, and seeing where this takes me.. so many ideas at the moment!
Delete